In this tutorial, you will learn all the step to set up your NESS for your loudspeaker configuration
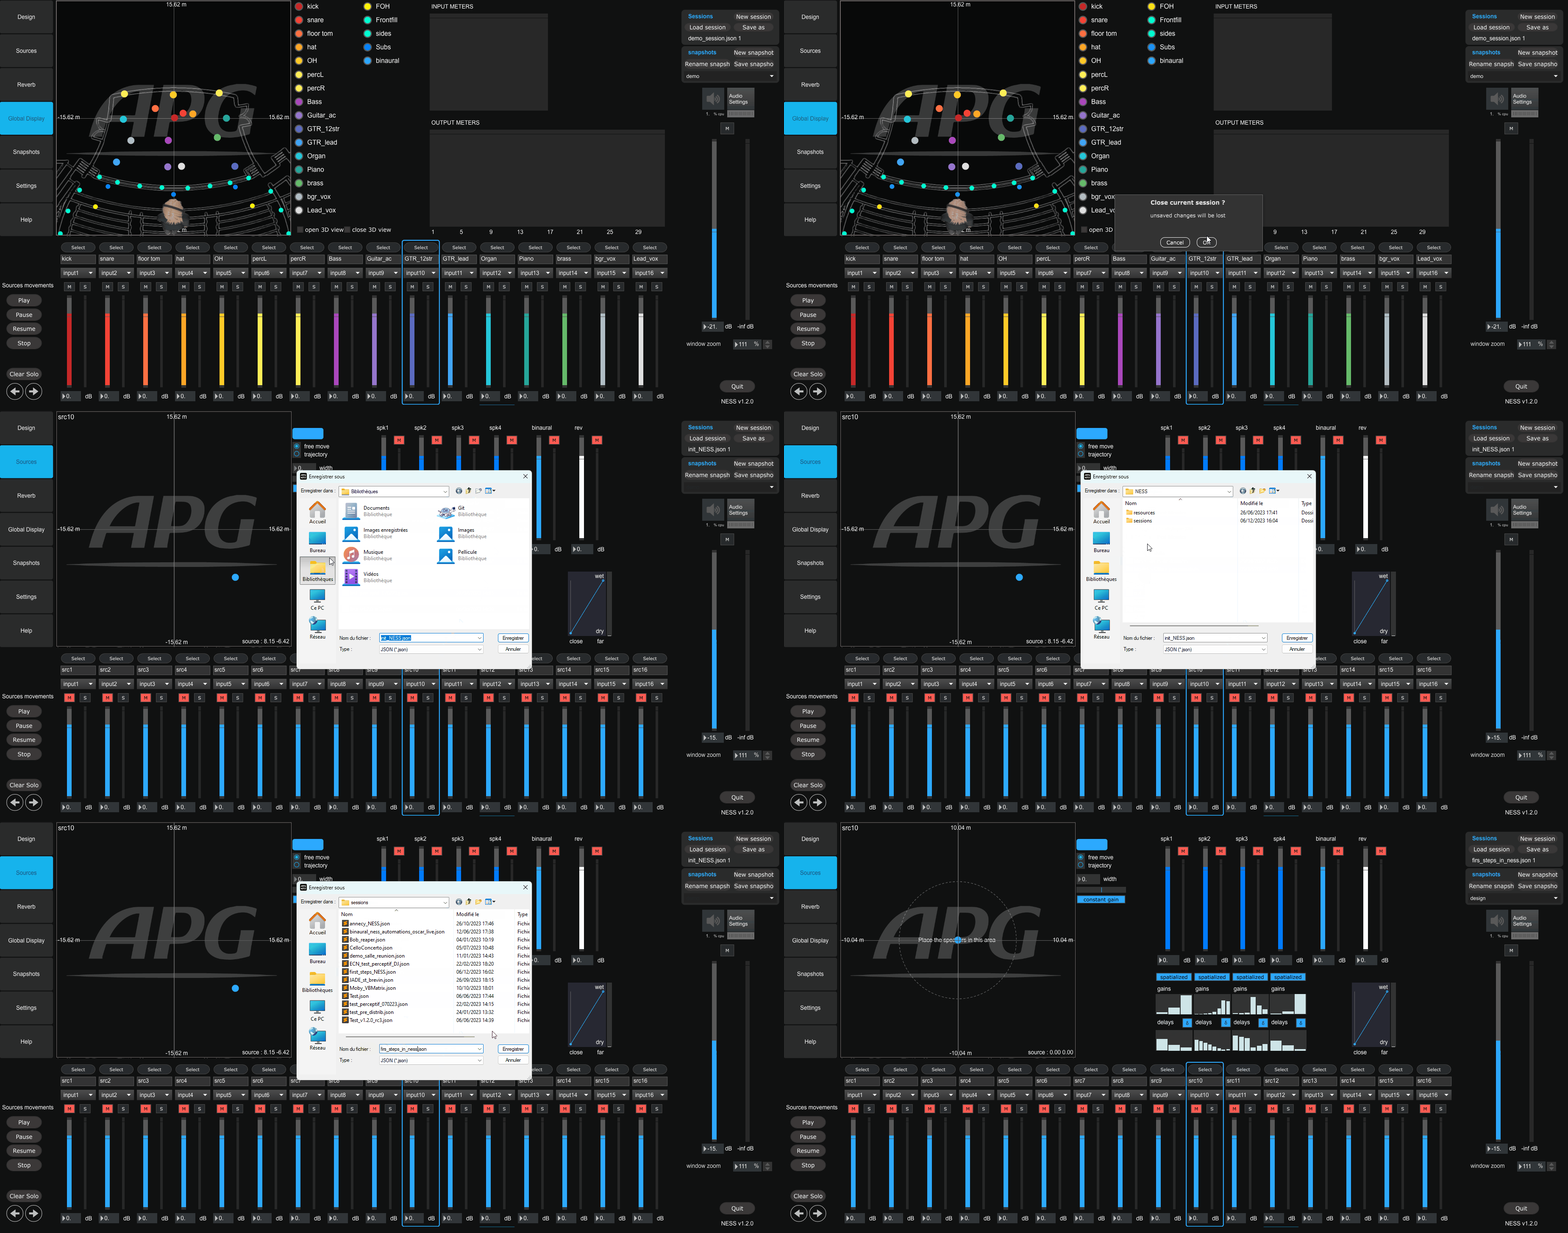
Create a new session
- Open NESS and create a new session by clicking on “New session” on the upper right corner
- Save your session file in the “session” folder of NESS
- a first snapshot is automatically created, rename it
Configure your venue
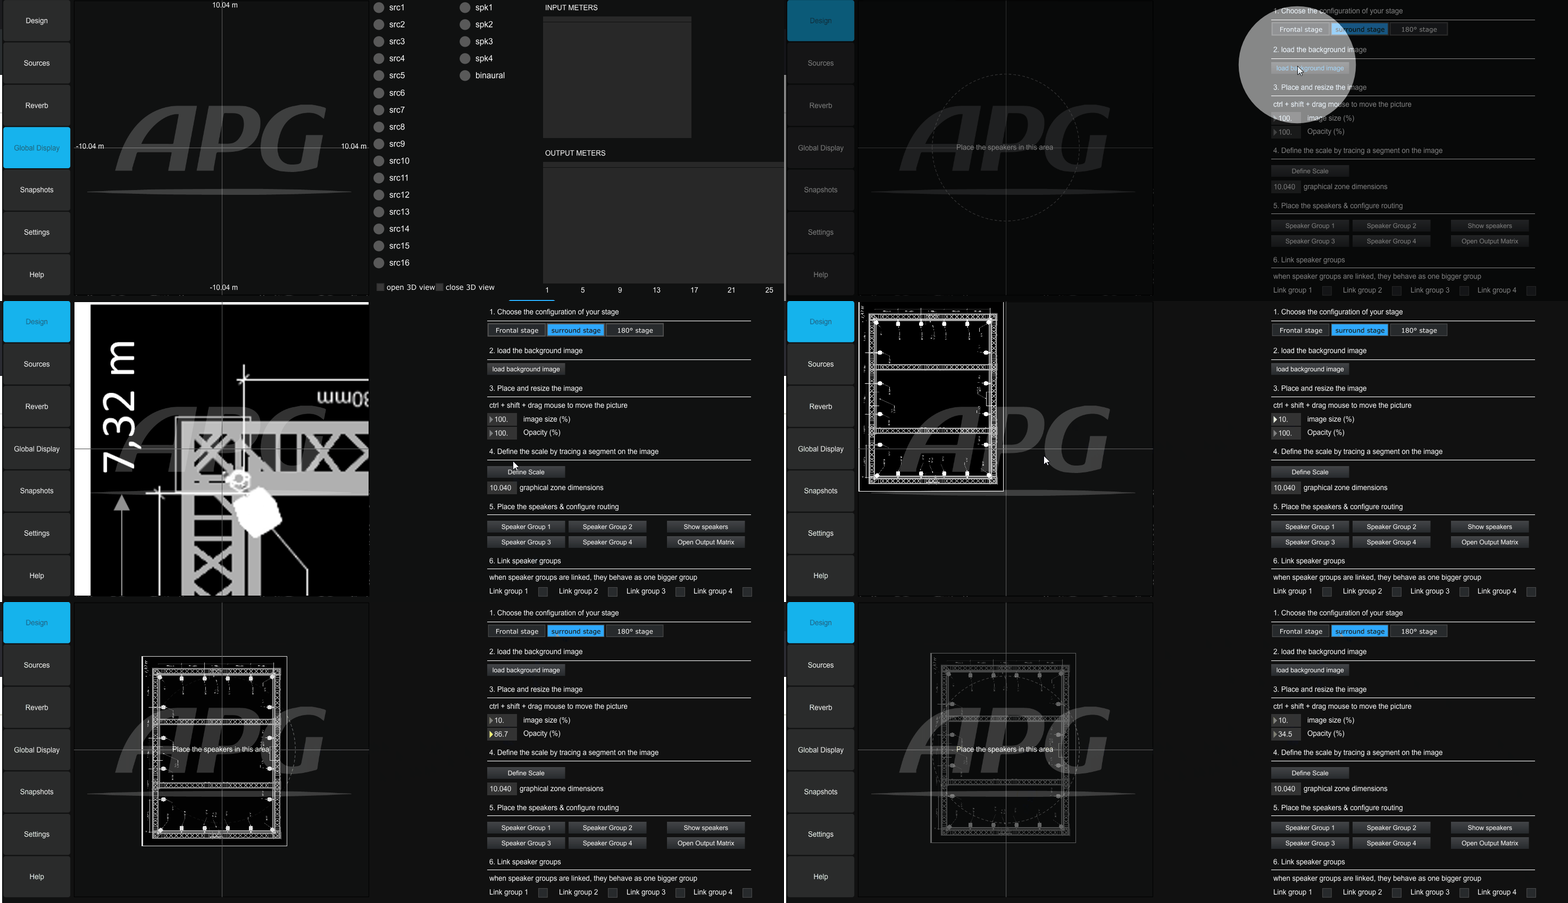
- Go the Design tab
- Choose your configuration:
- Frontal for a theater or a live concert where your loudspeakers are in line in front of your audience
- Surround for a 360° setup where your loudspeakers are place all around the audience
- 180° for a setup where your loudspeakers are placed on a semi circle
- Choose your background image
- get an image showing a scaled top view of your venue with the loudspeaker positions
tip : take a photo of the emergency exit map or draw it roughly with a drawing software - if needed, you can convert your image to white on black for a better integration in NESS : https://apgness.pythonanywhere.com/
- load the image in the software by clicking on “load background image”
- get an image showing a scaled top view of your venue with the loudspeaker positions
- Place and resize your background image
- resize the image by setting the zoom parameter
- click in the graphical area while keeping ctrl + shift pressed (cmd + shift on a mac) to move your image
- move your image so the loudspeakers positions on your image are placed within the dedicated area
- Set the transparency of your image
- you can adjust the transparency of the background image to make it more discrete
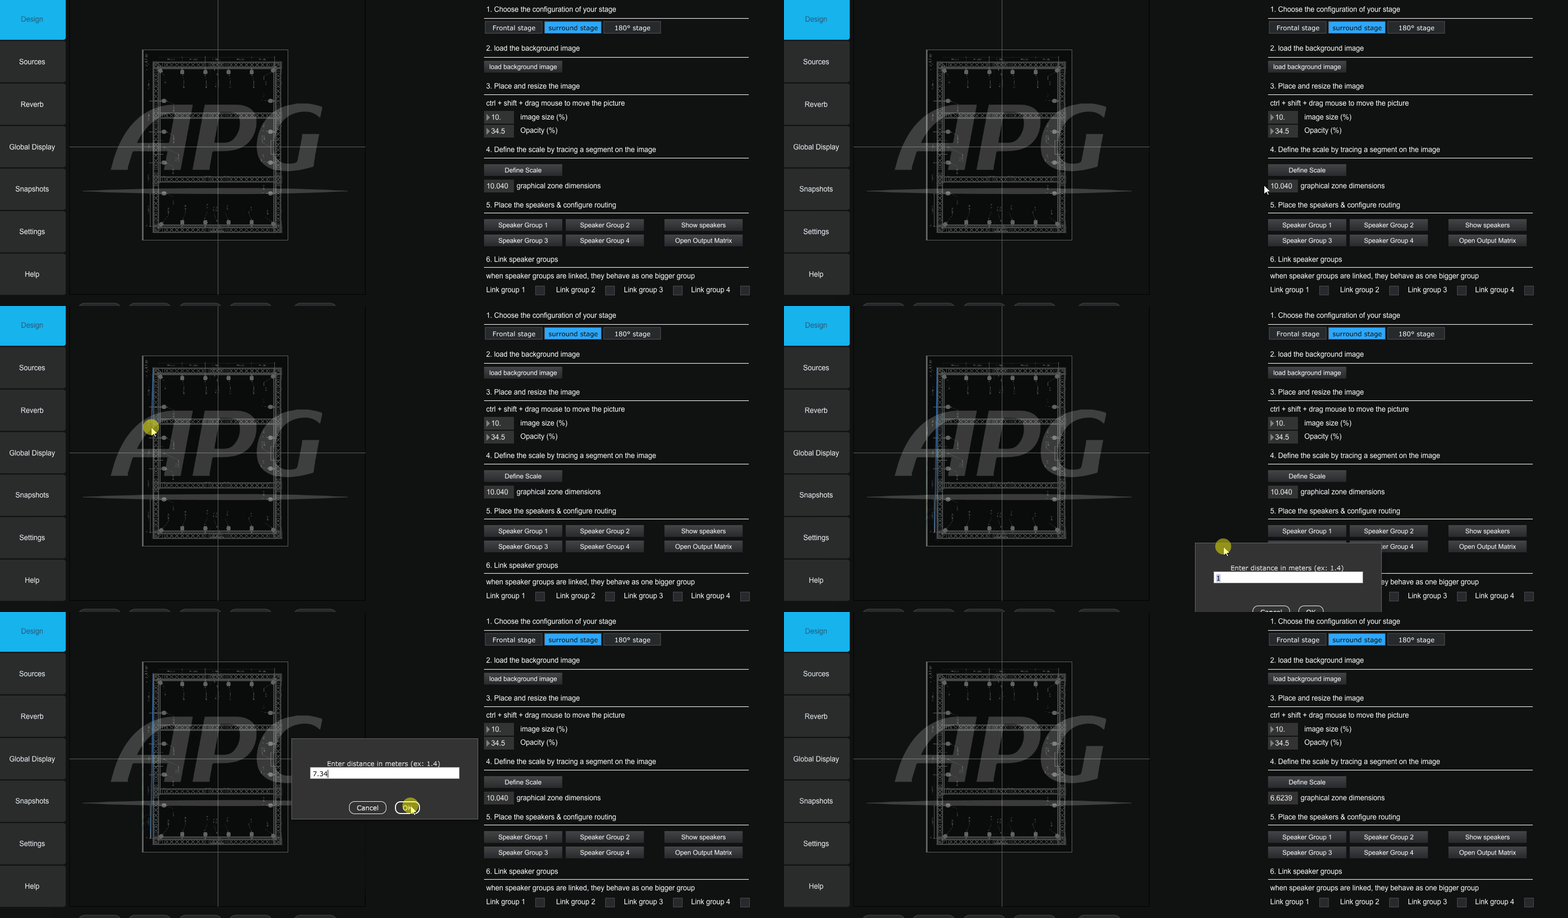
Set the scale of your image
- first click on “Define Scale”
- Locate 2 points on the plane where you know the distance between them
- Click on the first point and while holding down the mouse button, move the cursor to the second point to draw a segment between the two points.
- Release the button
- enter the distance in meters in the dialog window. the graphical zone dimension should have been updated
Place the loudspeakers
NESS uses 4 groups of 8 loudspeakers to allow different processing for different kind of loudspeakers. for instance you an use a first group for a speaker ring and a second one for the subwoofers
You can link several groups if you uses more than 8 speakers of the same kind. all linked groups will share the same processing configuration
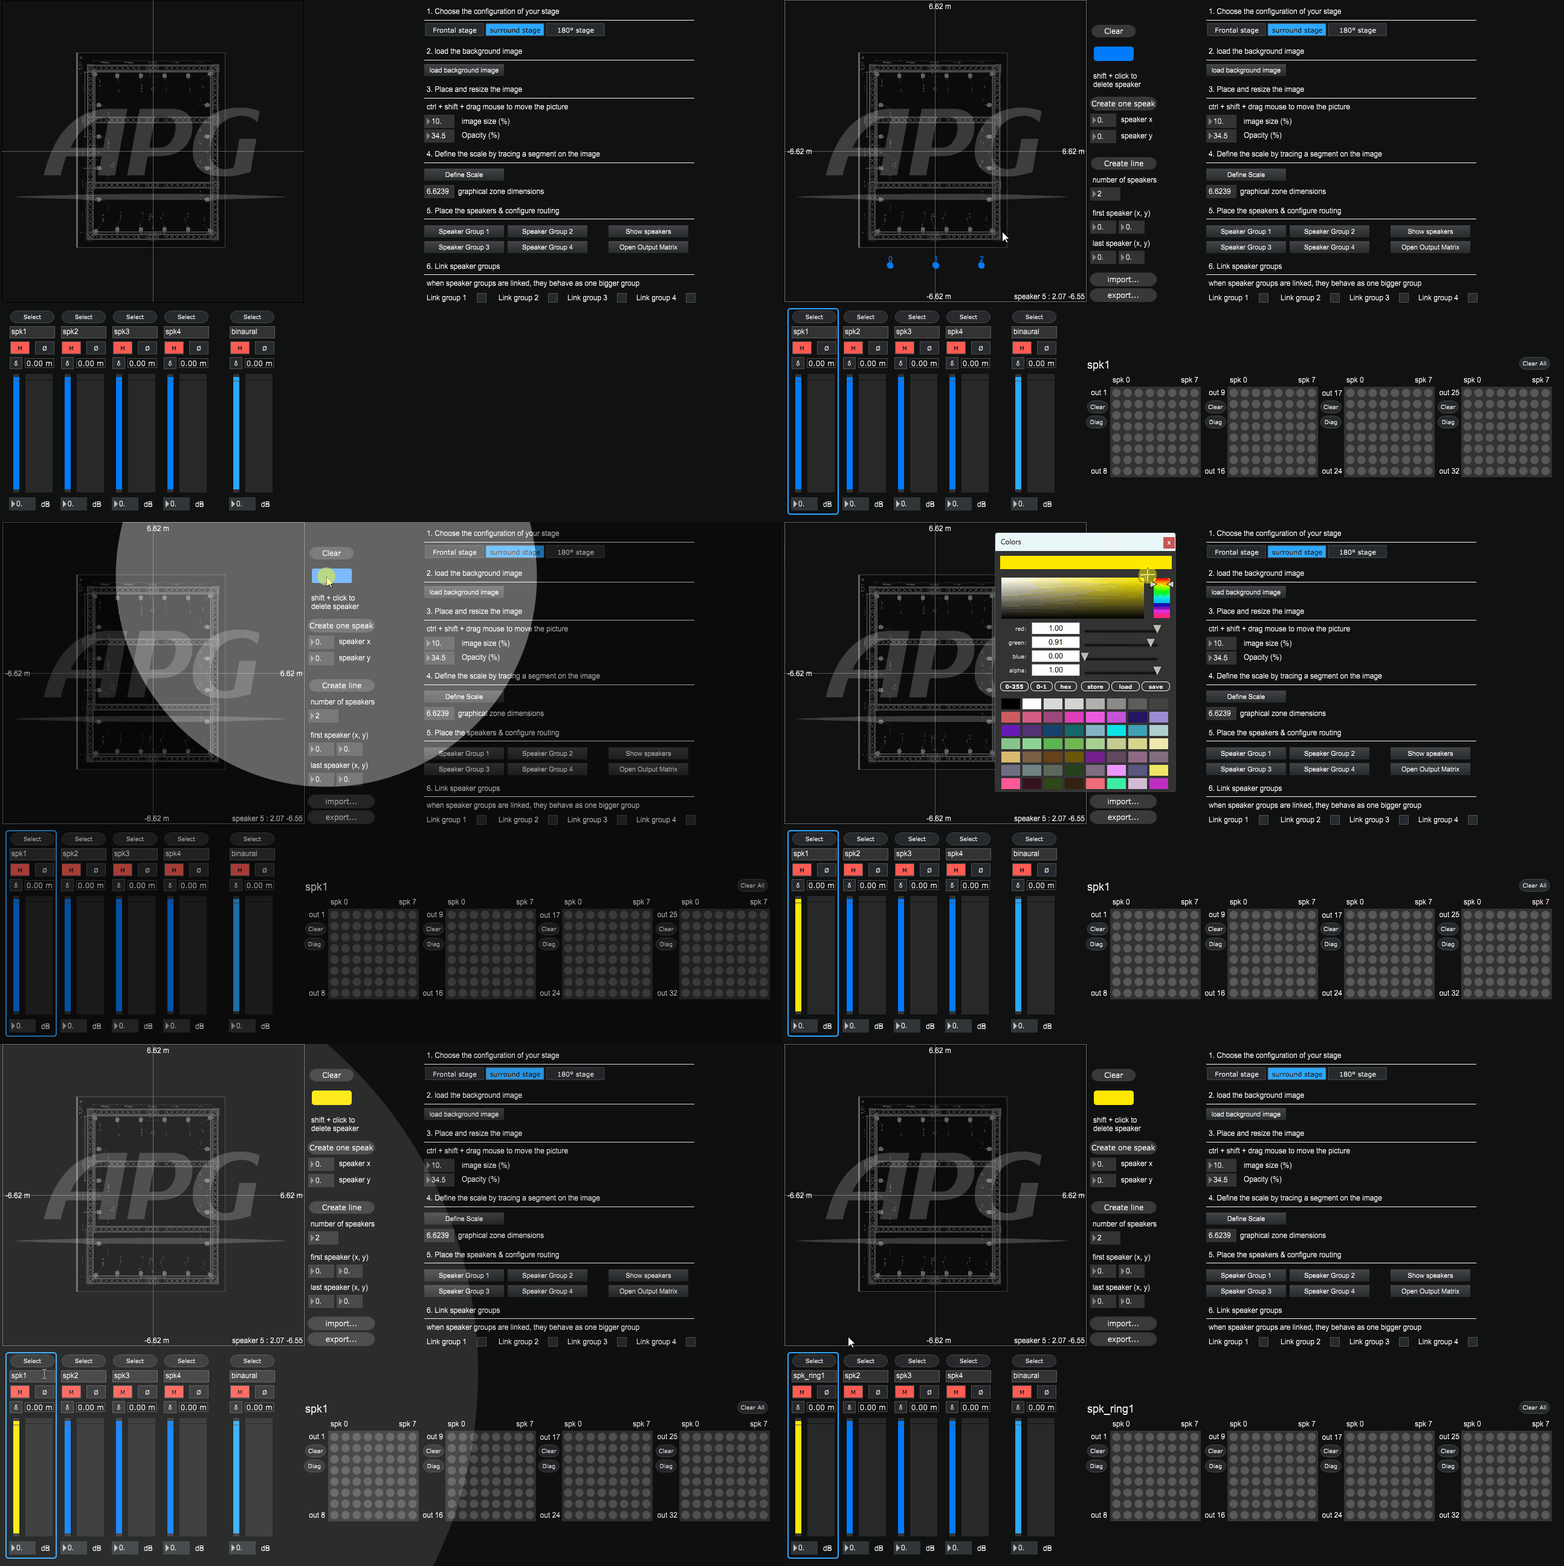
- Click on Speaker Group 1 to display the loudspeaker group commands
- Clear the group
- set the color of the group according to your preference
- set the name of the group
- To create loudspeakers in the group
- create a loudspeaker by cliking on “Create one speaker”
- click on the created speaker and while holding down the mouse button, move it to its position
- repeat the two previous steps for all other speakers of the group
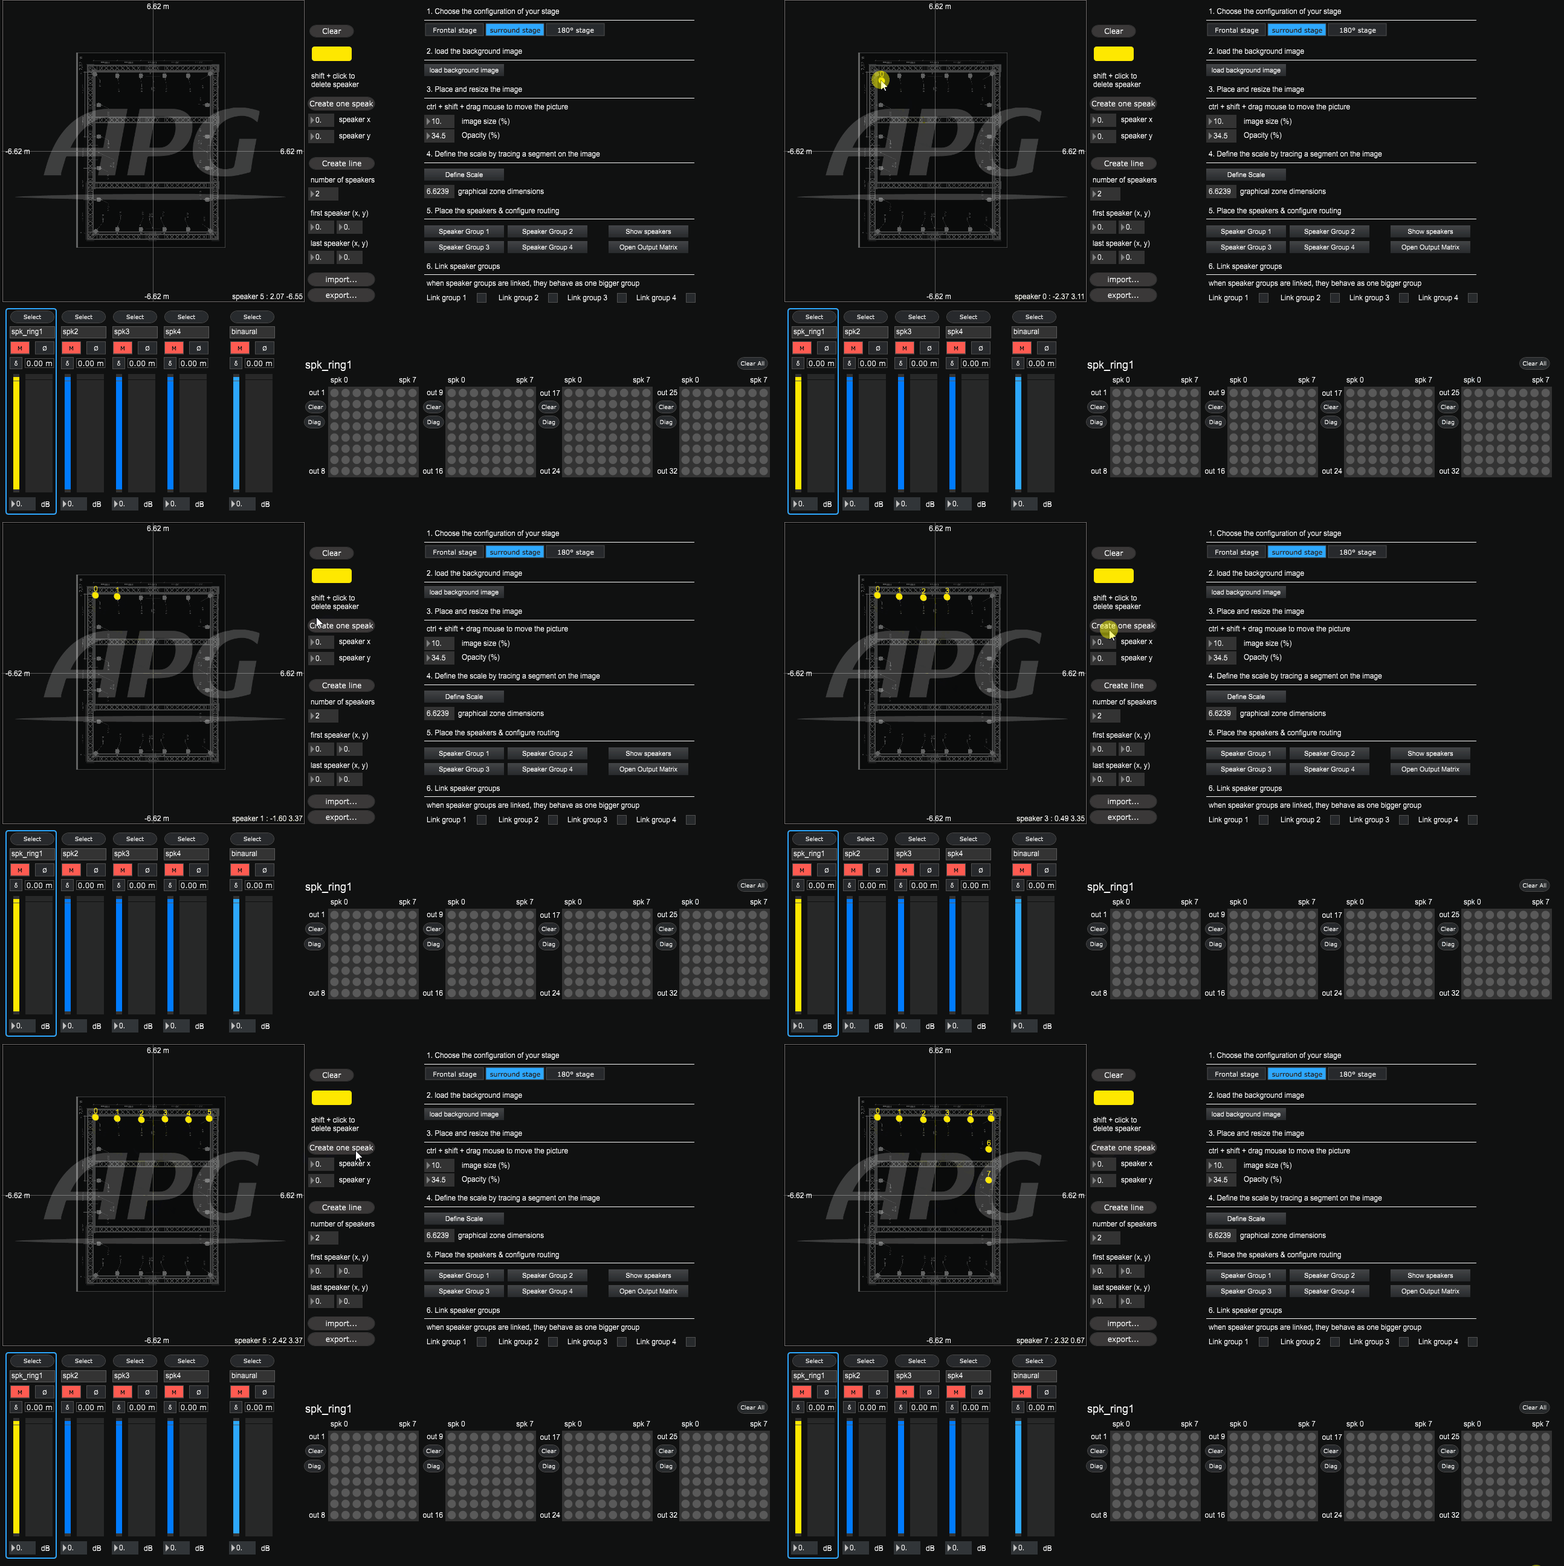
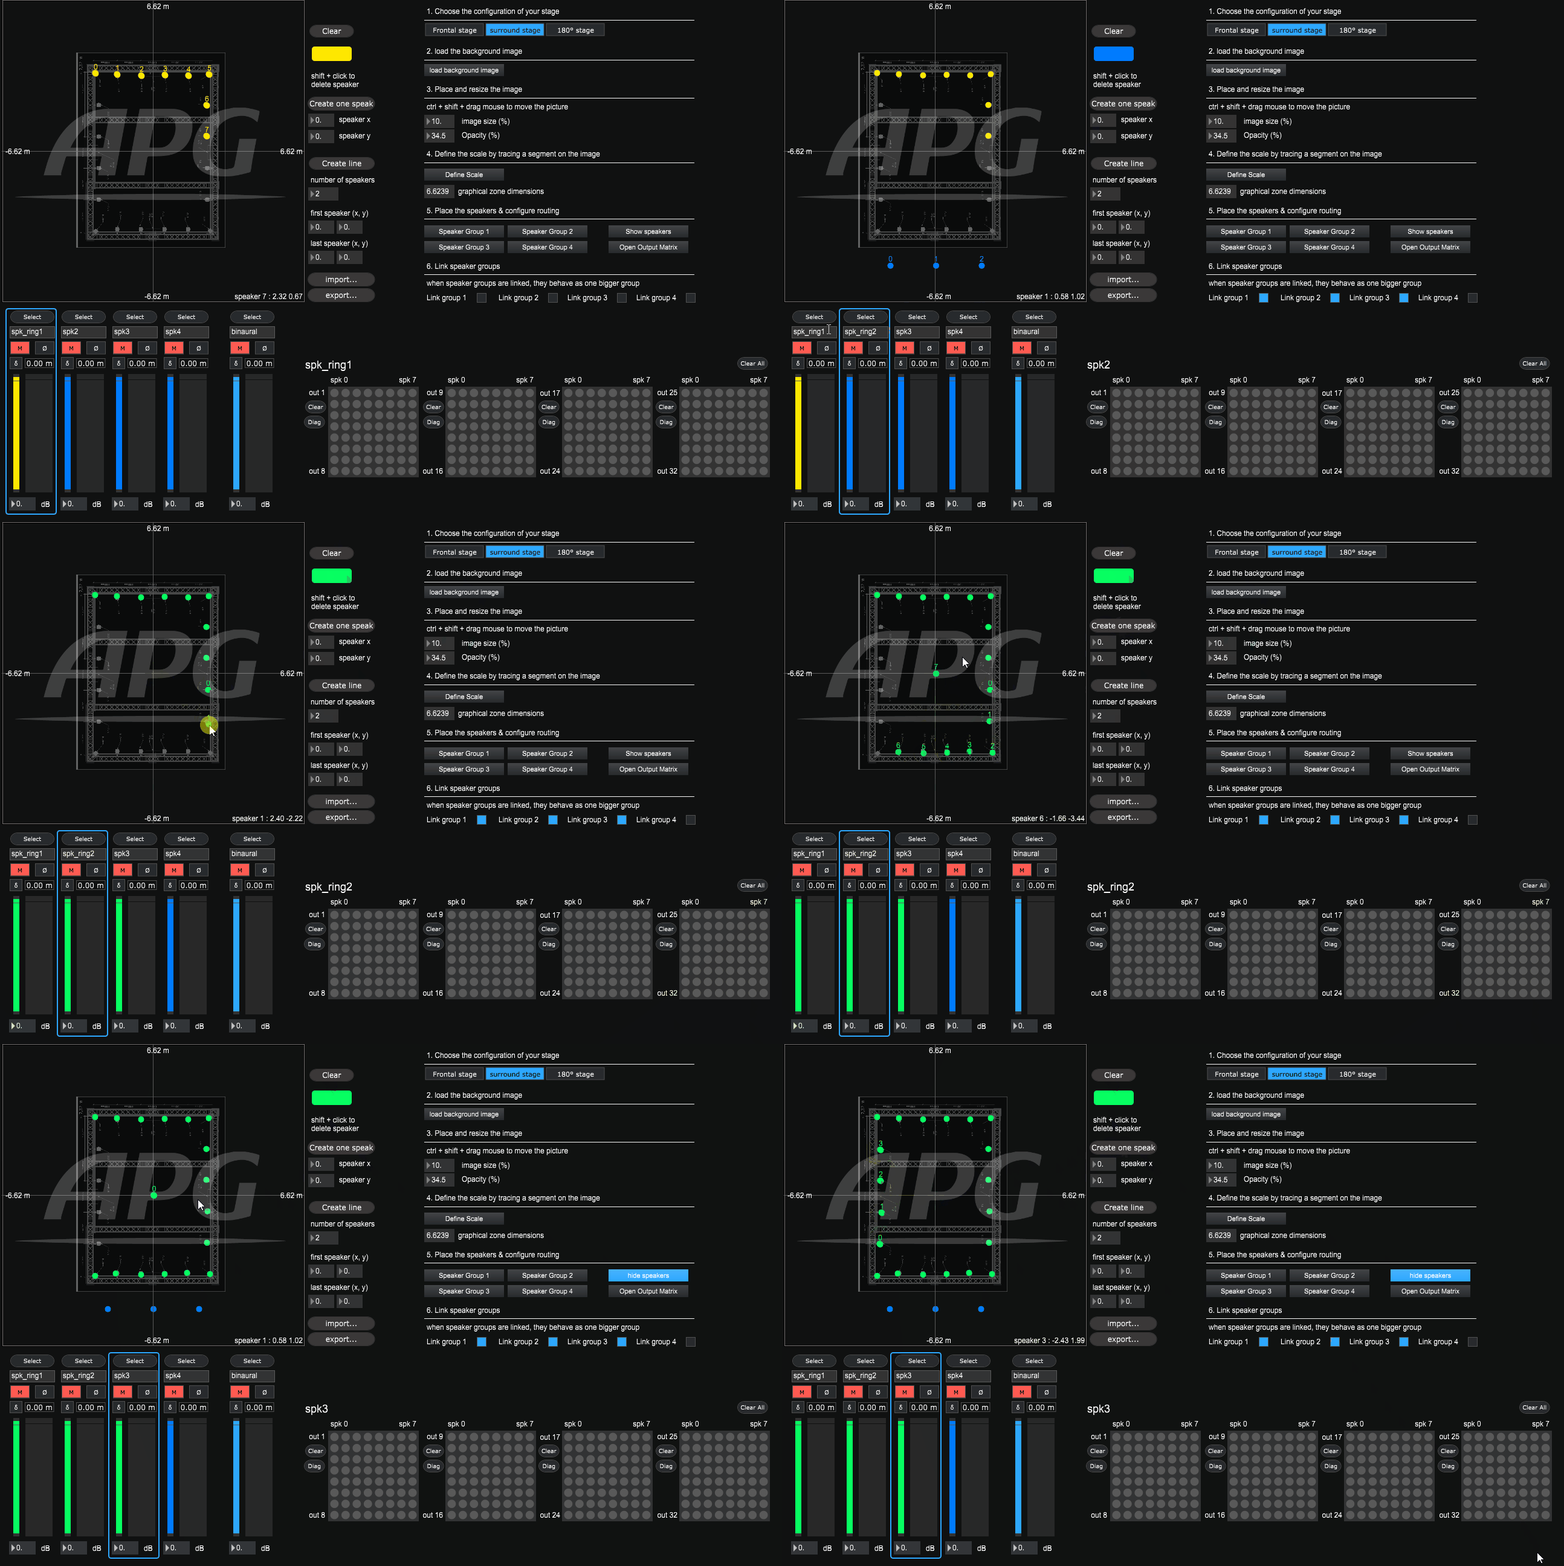
If you need more than 8 speakers of the same model:
- enable the link for several groups to ensure they share they will work as one bigger group
- select one other group
- name it
- choose its color, it will automatically change the color of all linked groups.
- clear the group, create and place the speakers
- repeat the previous steps for the other linked groups
in this exemple, we need 20 speakers, we will link the first 3 groups to have all 20 speakers working together
If the speakers are not showed, you can click on “show speakers”
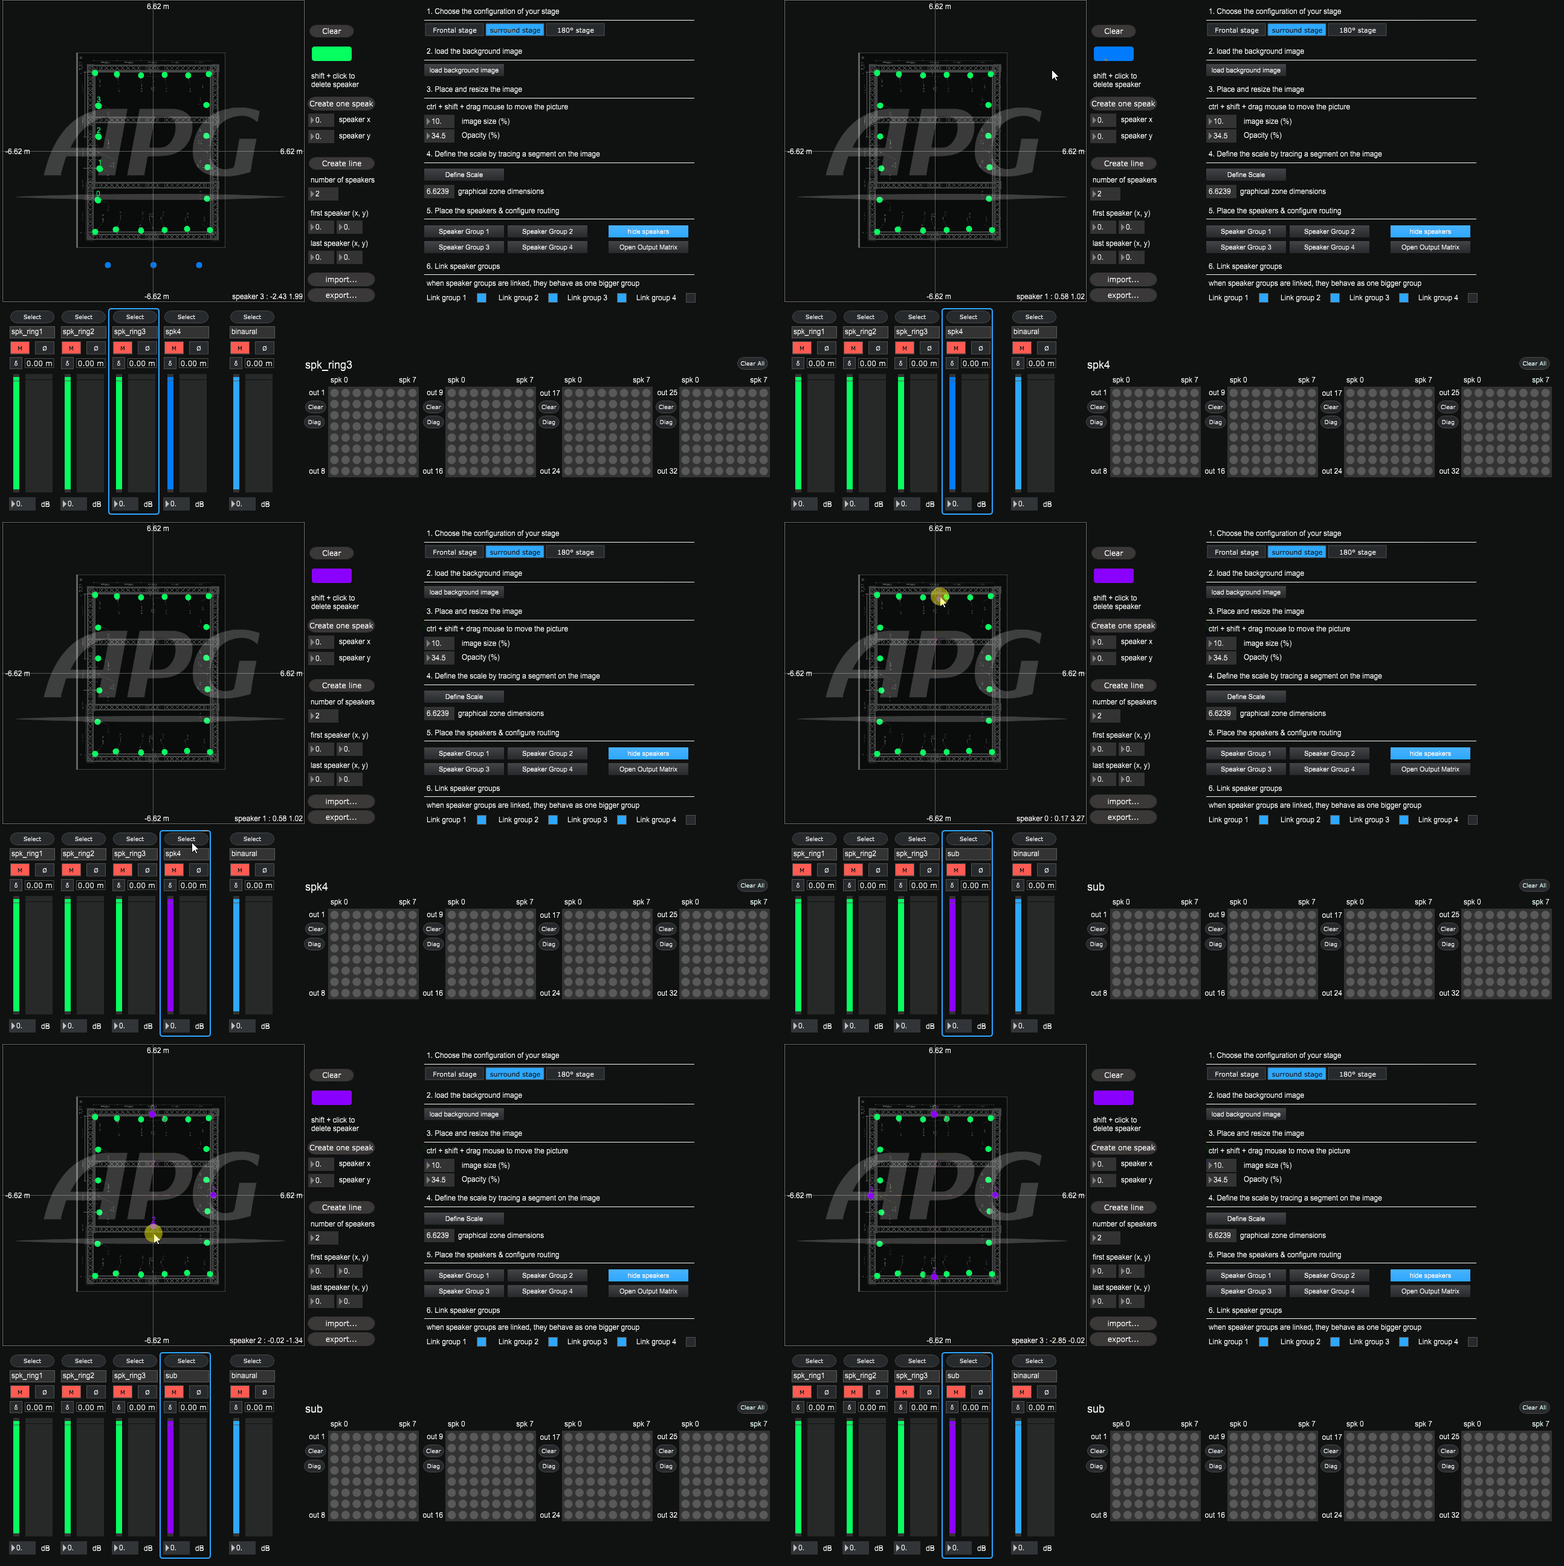
You can use one free group for subwoofers
- select the group
- choose its color
- rename it
- clear the speakers
- for each speaker, click on create one speaker and place it on the background image
- Save the snapshot by clicking on “Save snapshot”
Route the signals to your soundcard outputs
Once you have created all your loudspeakers, you must associate it to a given output of your soundcard.
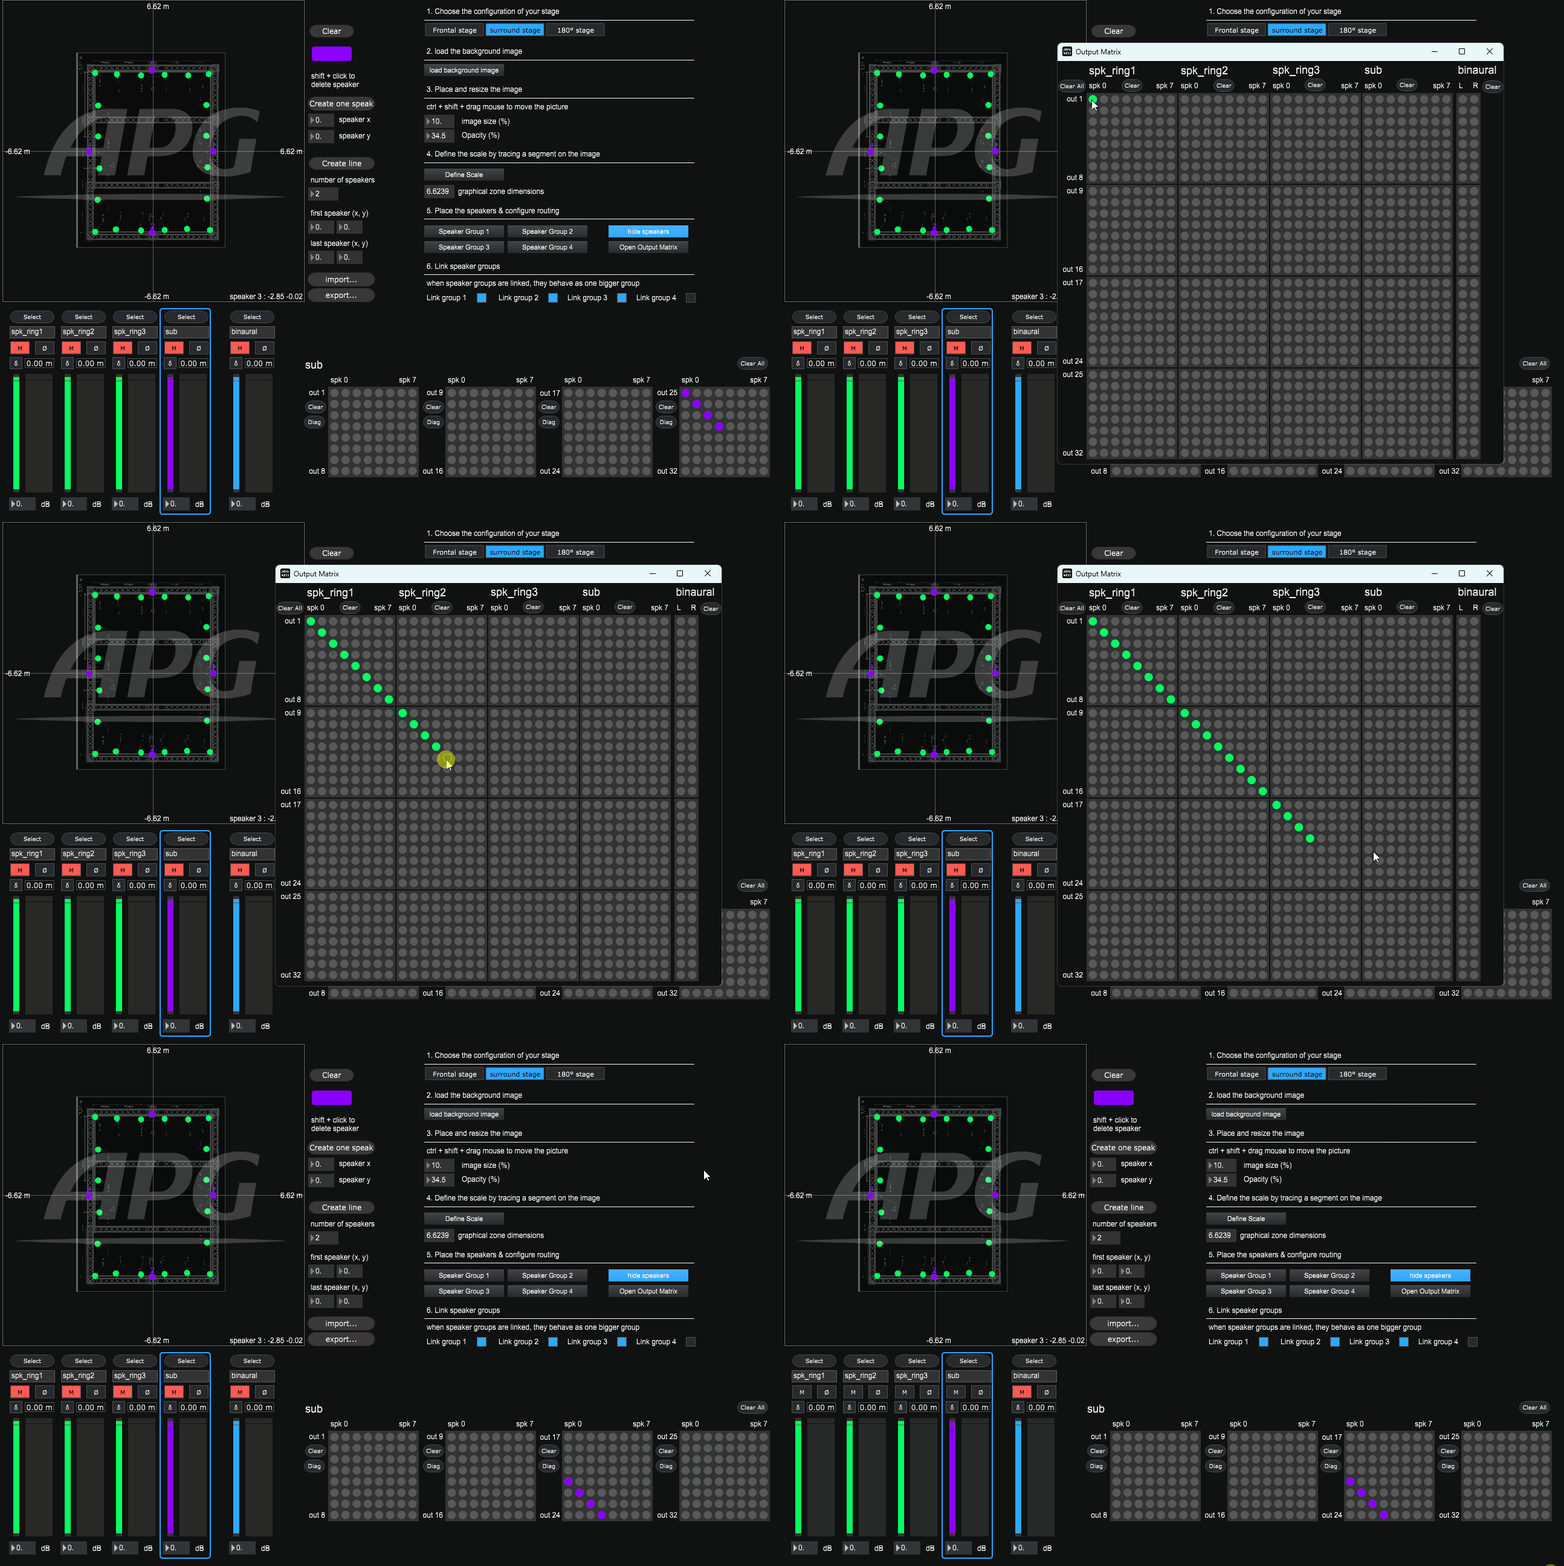
- Open the output matrix. on a mac it is located in a tab at the top of the application
- Clear all existing routings
- For each speaker (in colums), click on the output of your soundcard (in line) to which it is connected
Don’t forget to save the snapshot !!
